Viki Sews Cynthia blouse review

The Viki Sews Cynthia blouse is one of those rare patterns where as soon as I saw the pattern, I had to buy it!

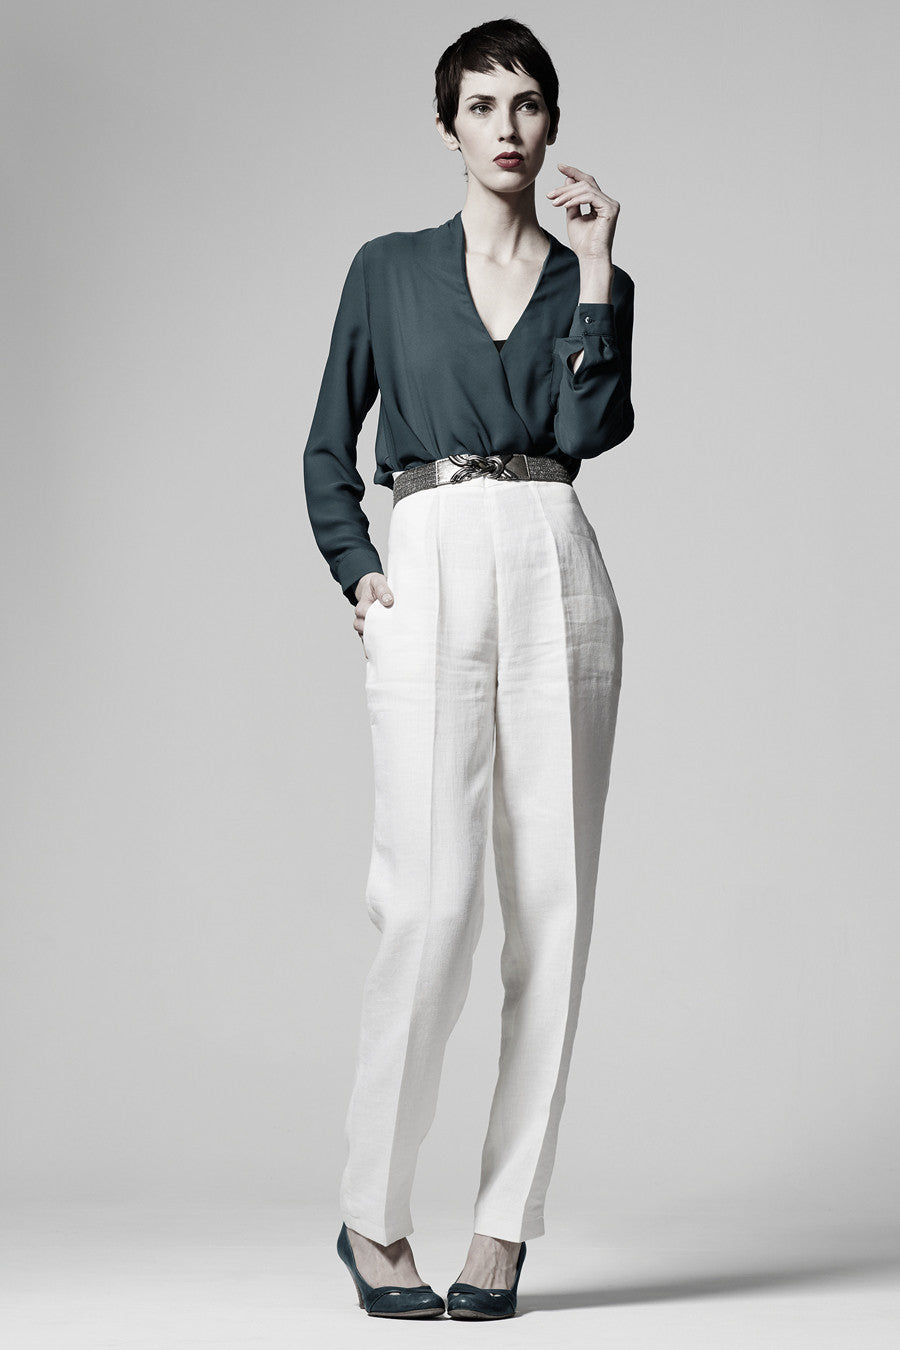
I’ve been looking for an oversized striped dress shirt, but due to my short torso, most oversized shirts in stores tend to overwhelm my frame. Like this one from Arket would probably look more like a dress on me:

Arket oversized striped shirt

About Viki Sews

If you haven’t sewn with Viki Sews before, something to be aware of is that like many other Russian patterns, it comes in single size only though there are 4 height ranges (no nested sizing). In other words, if you need to grade between sizes, you don’t have the possibility to sketch a smooth line between sizes as you would with nested patterns. The other thing to be aware of is that as it is a Russian pattern company, all measurements are in cm. 

One tip: I purchased my pattern through The Fold Line and by doing so, you get all heights for the size purchased. Though as mentioned, the sizes are not nested.

Interfacing woes

I started sewing this shirt back in August 2021 but as I’ve mentioned before, I spend most of my sewing time thinking. I basically stopped when I got to assembling the collar and sleeve placket. The biggest hurdle for me is knowing when to use interfacing or not – I feel like I’ve “ruined” so many shirts by using too much or too stiff interfacing. I guess it comes with experience. (Or buying fabric and being willing to make extra samples?)

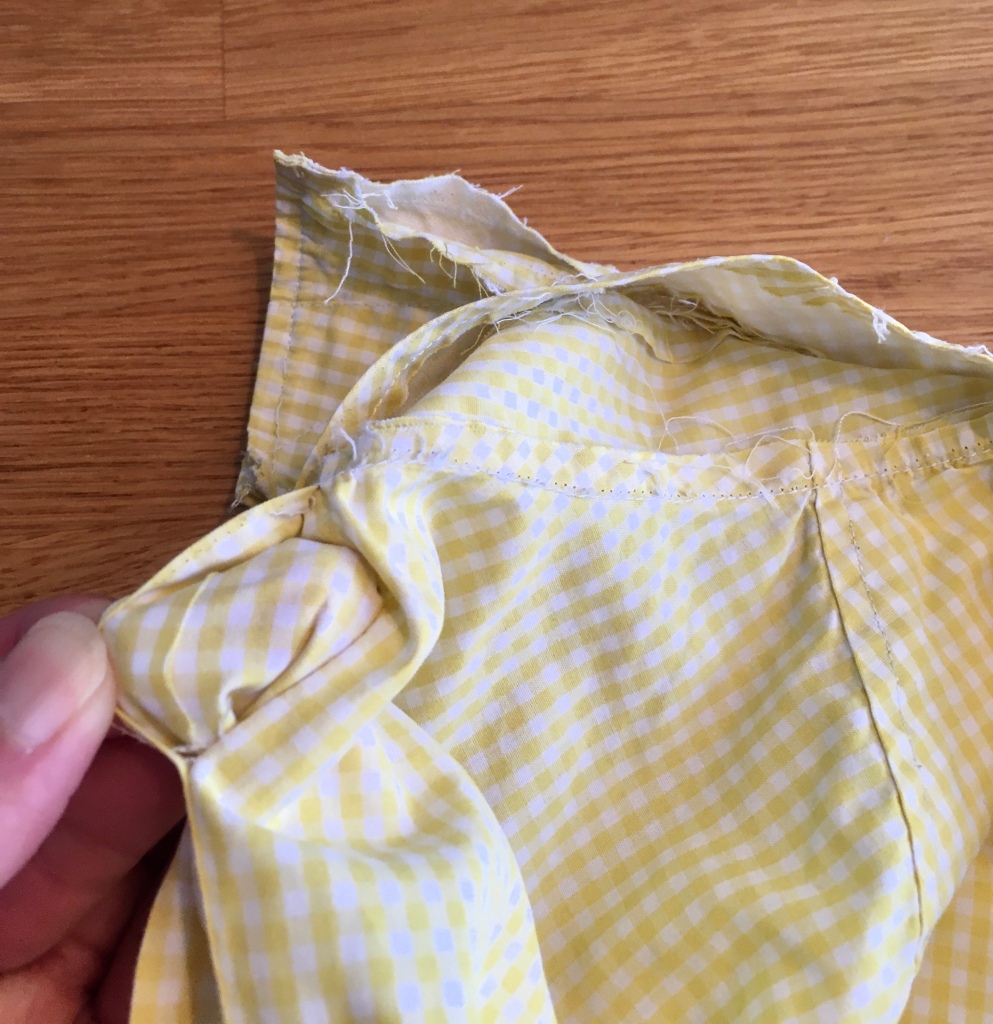
In my previous blog post I mentioned how I had taken apart a ready-to-wear shirt to peek at how much interfacing they used.

Here I feel like I nearly got it right by using only half the interfacing in most places and skipping it on the arm placket altogether. I only wish I used extra on the collar stand.

Pattern review

Were the instructions easy to follow? 

For the most part they were very clear for a beginner like me! There was one part where they missed a small step, but from the photos it was easy to see that there was a step inbetween. And in another instance I needed to google for a little help with the tower placket (since they used a solid fabric I couldn’t tell which was the right and wrong side in the instruction photos). But overall I’m quite pleased with the instructions, especially on how to sew and trim the collar. 

What did you particularly like about the pattern? 

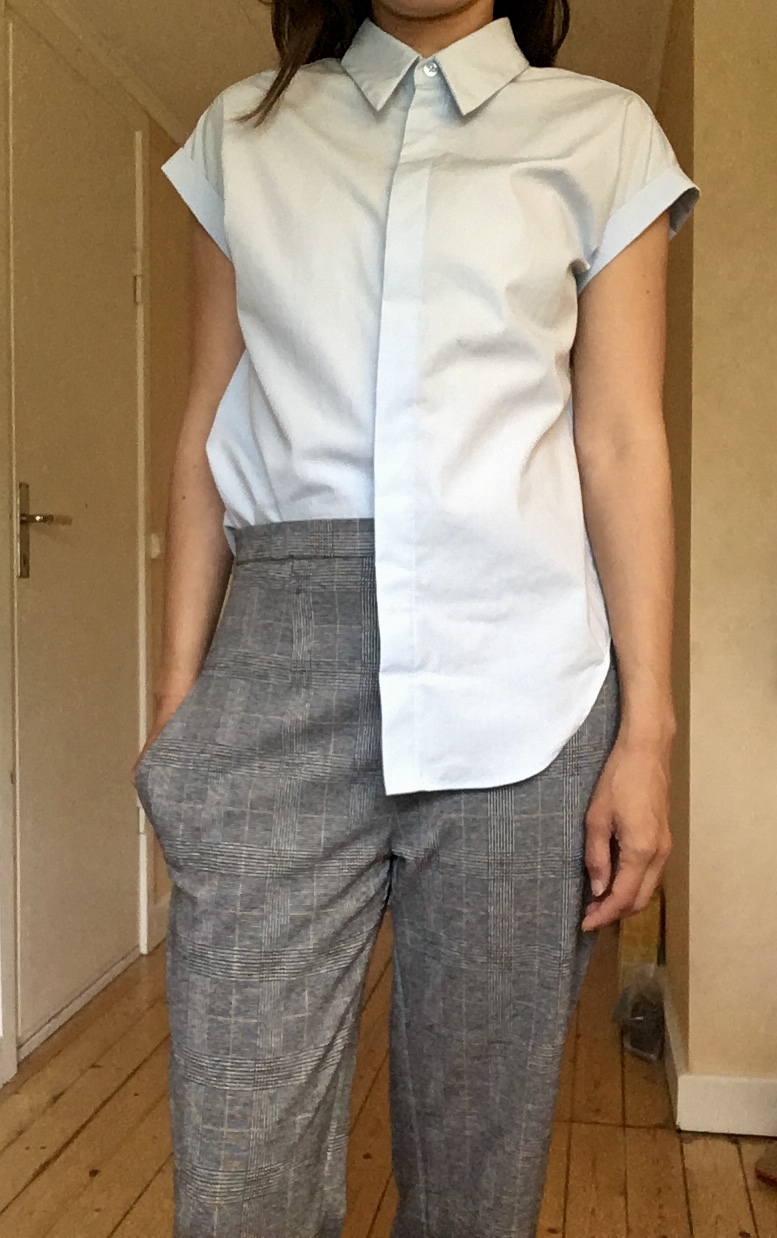
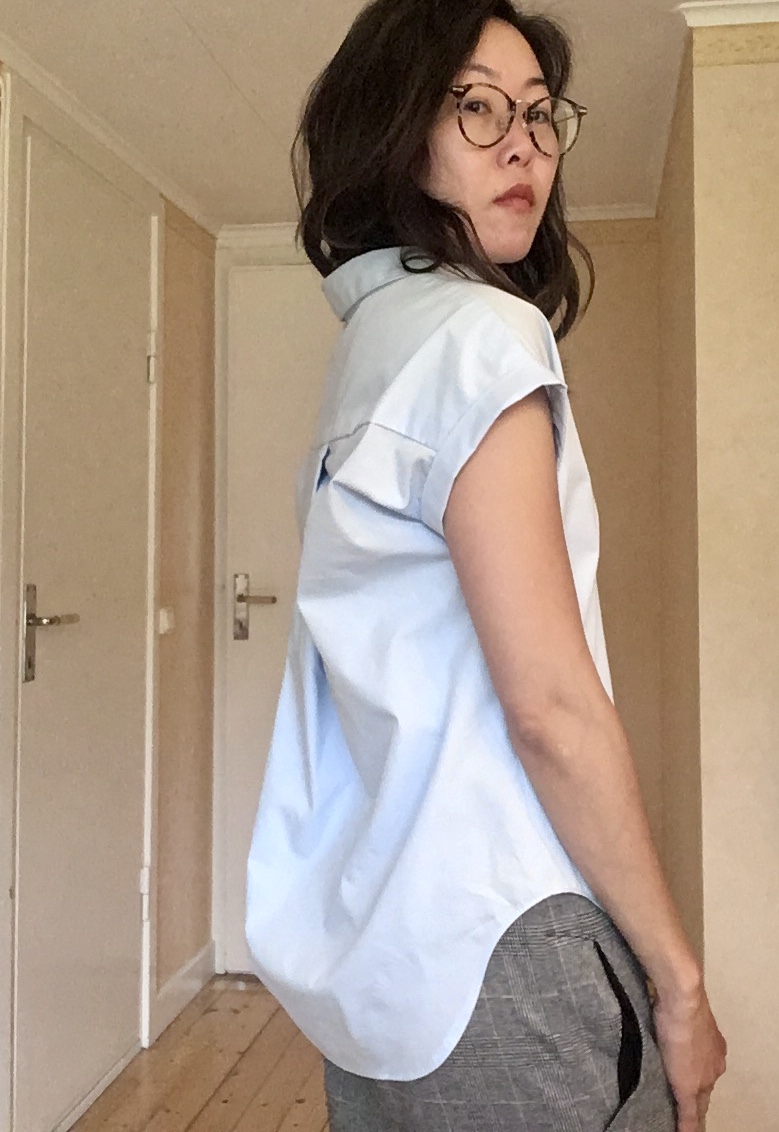
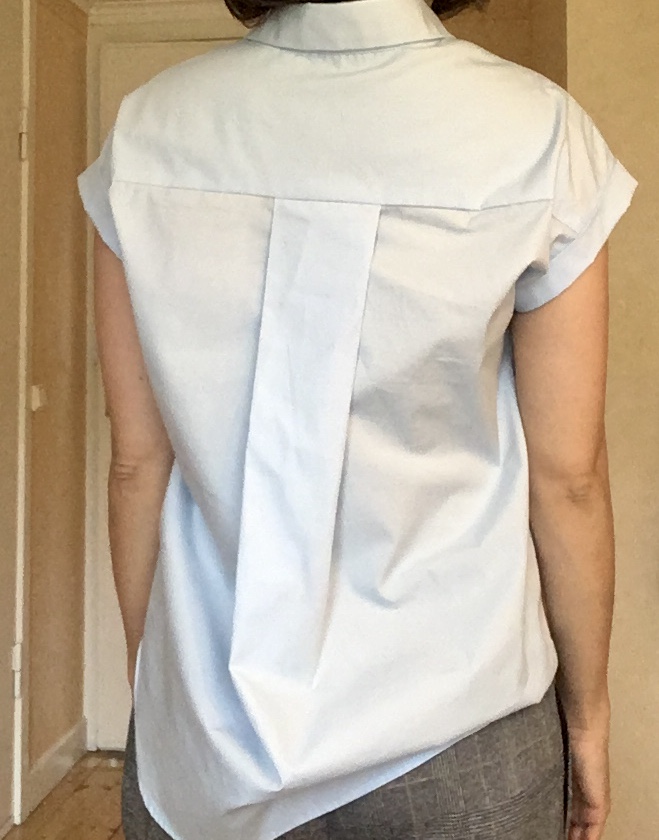
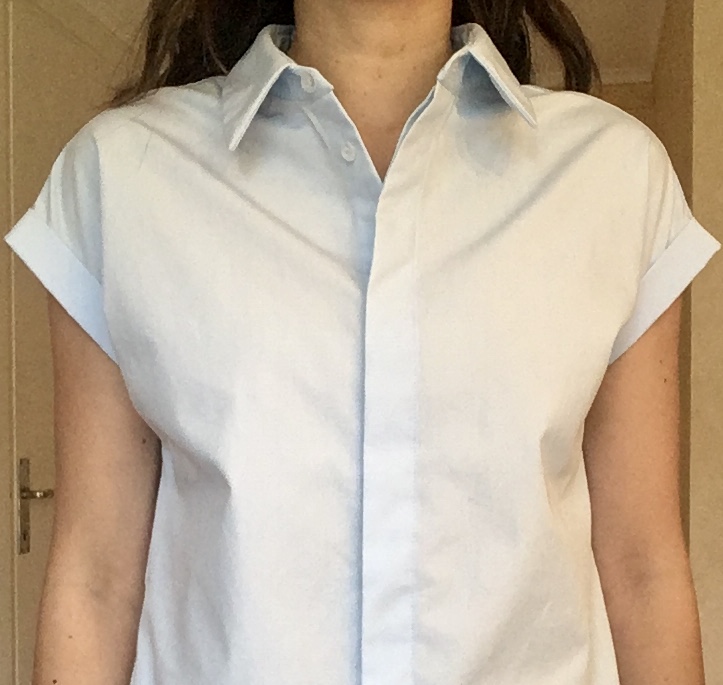
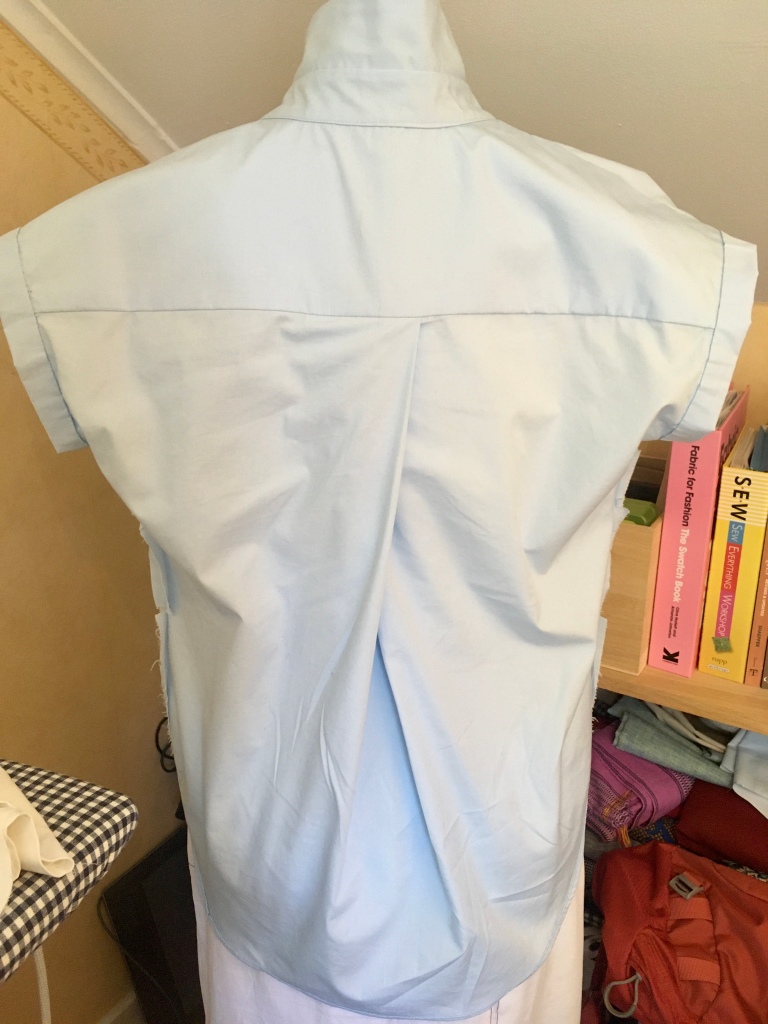
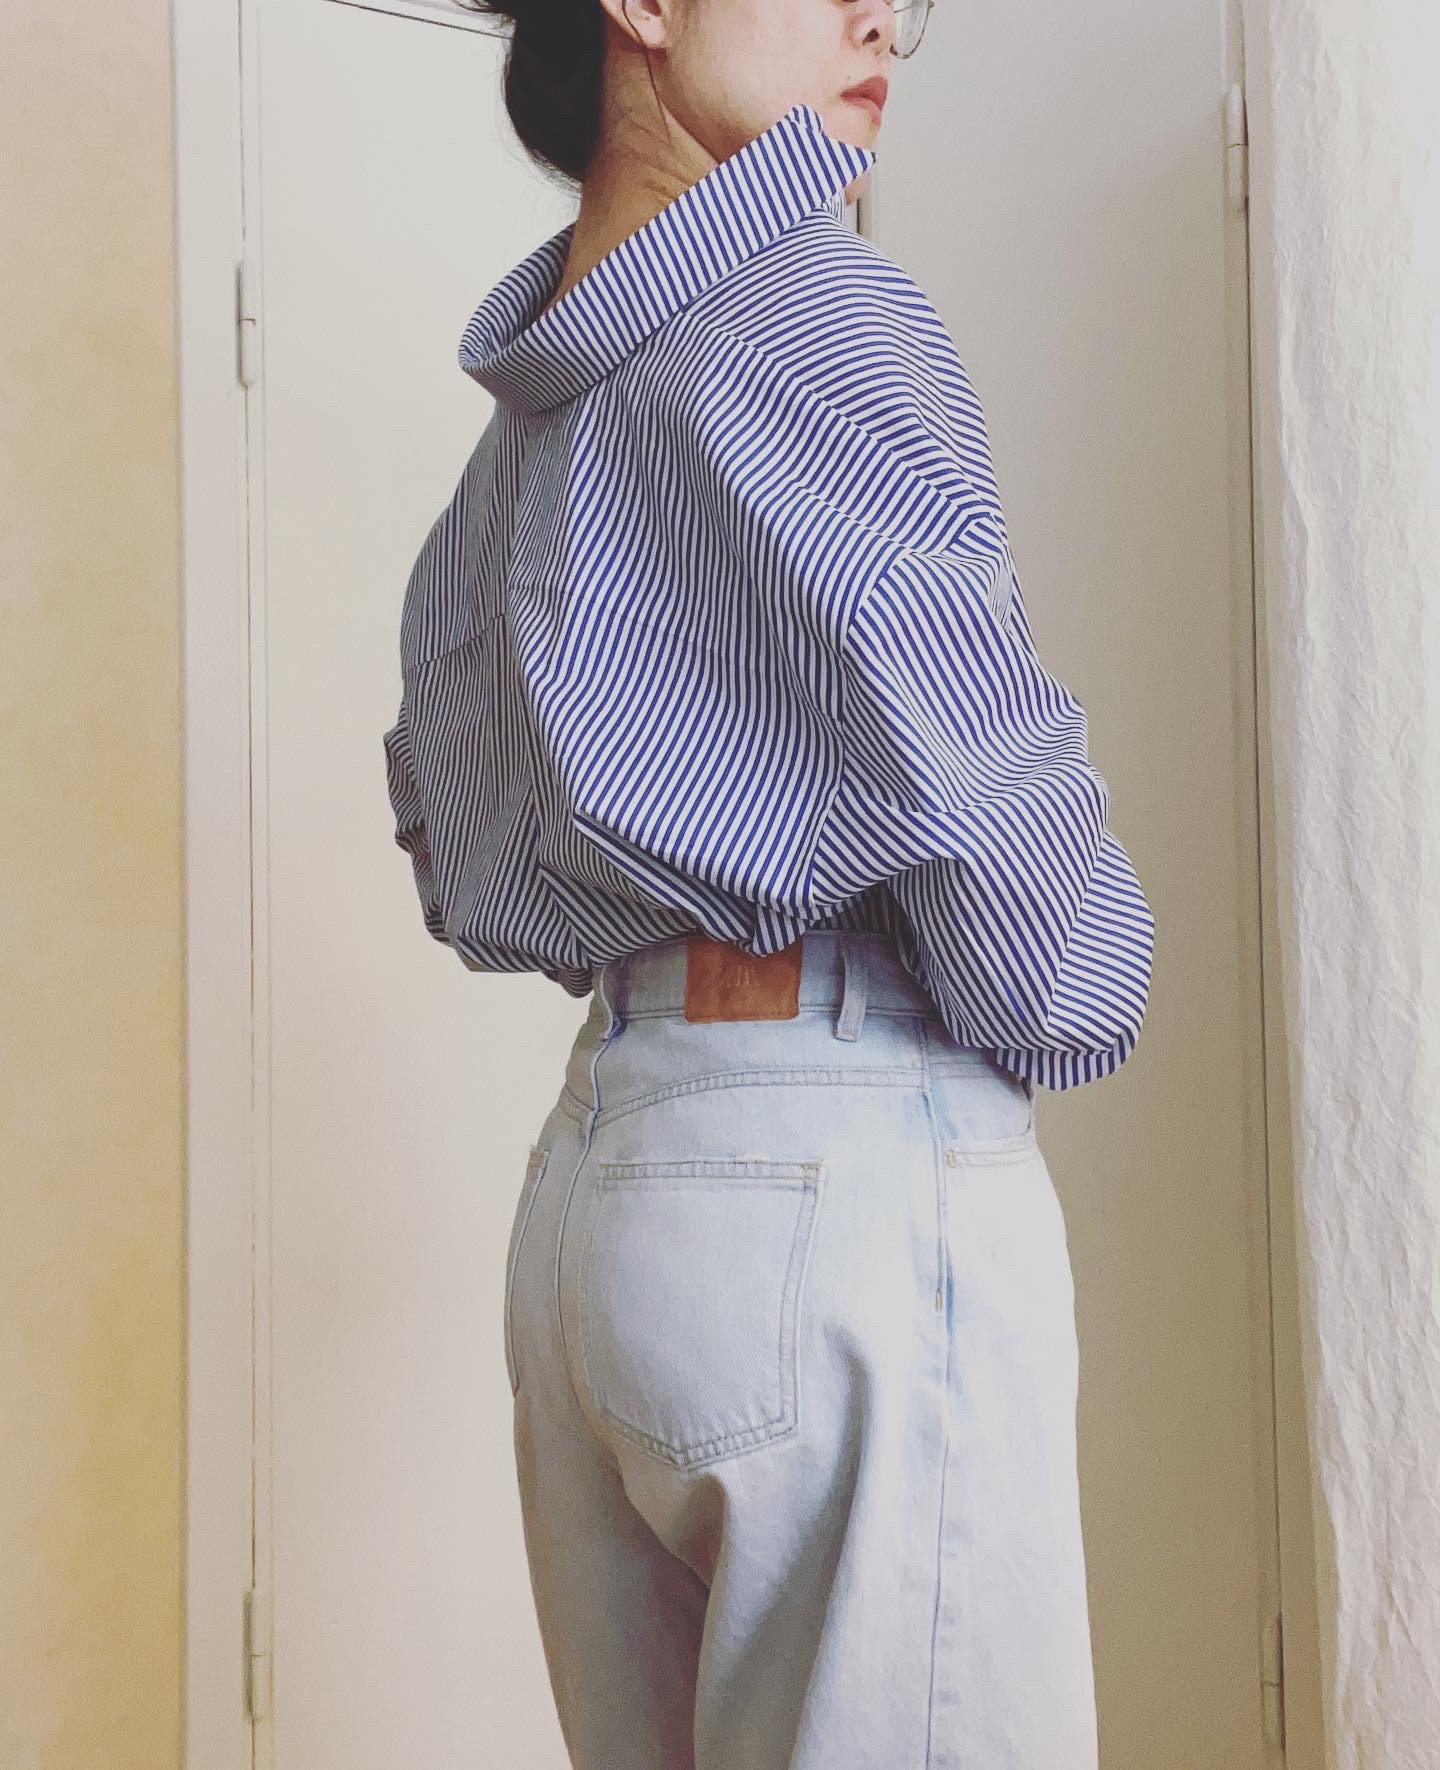
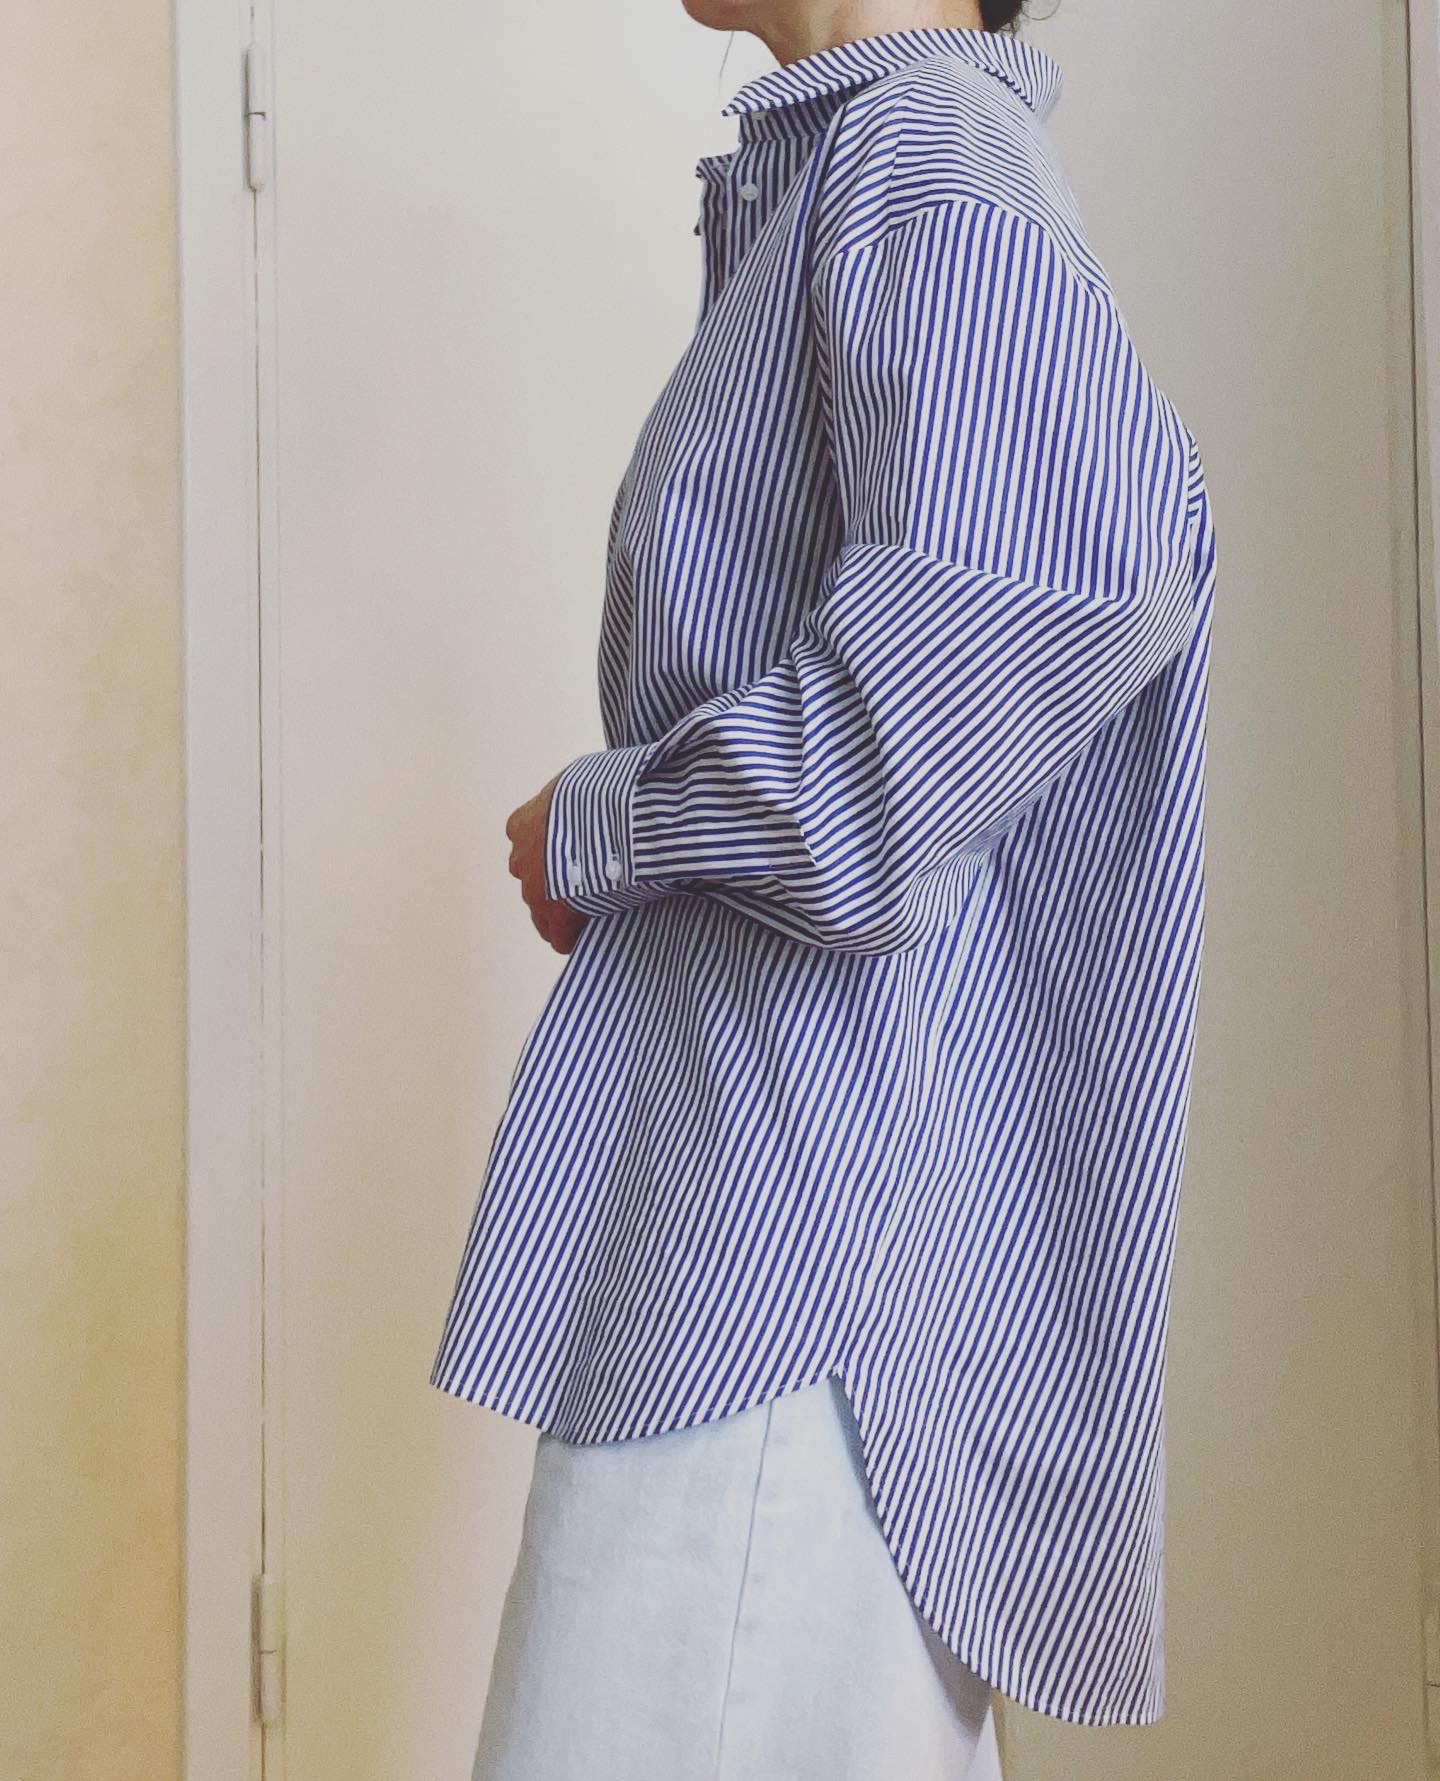
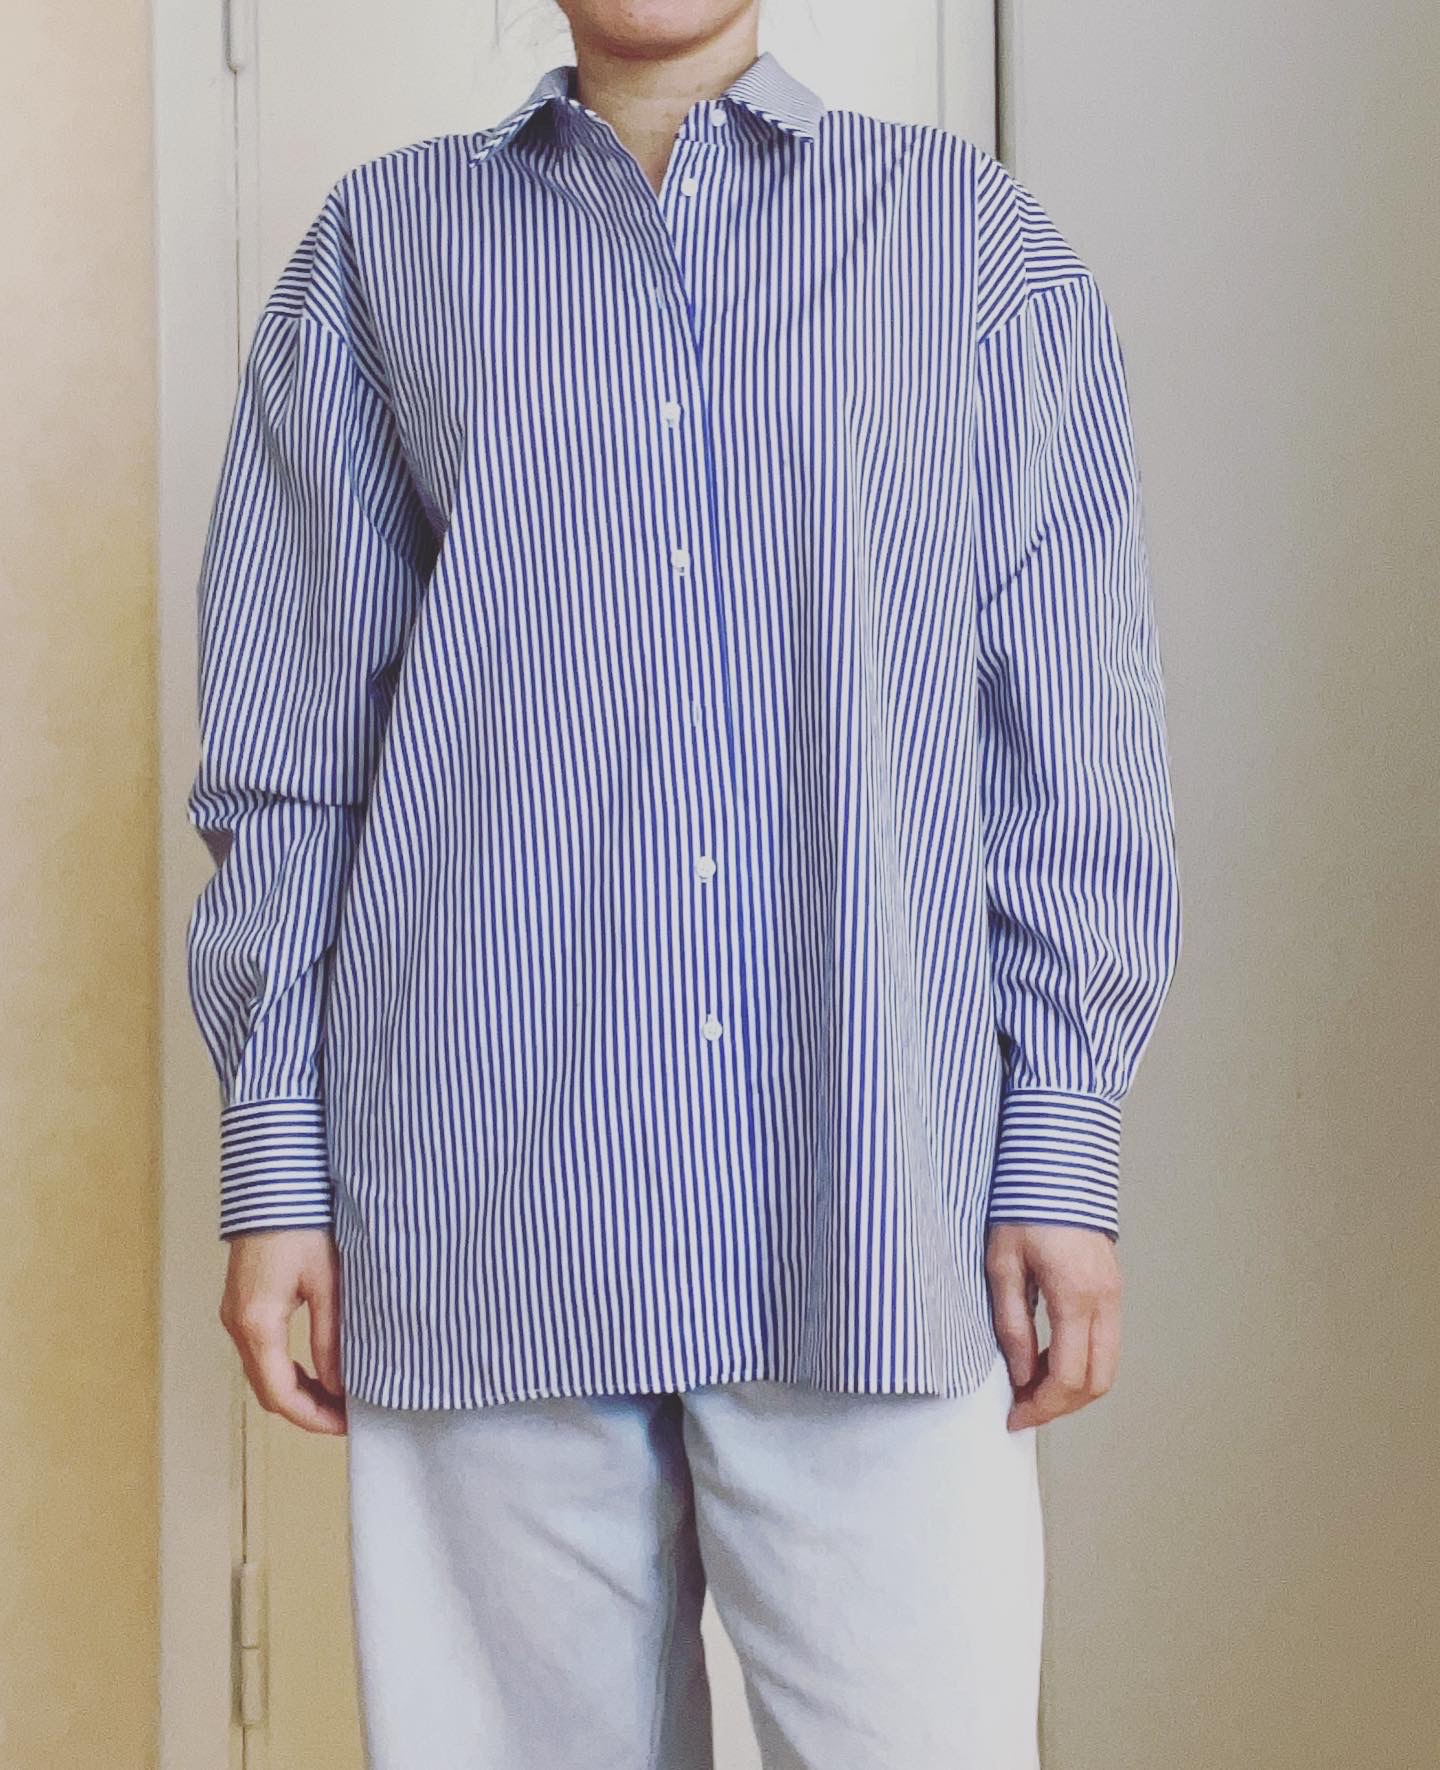
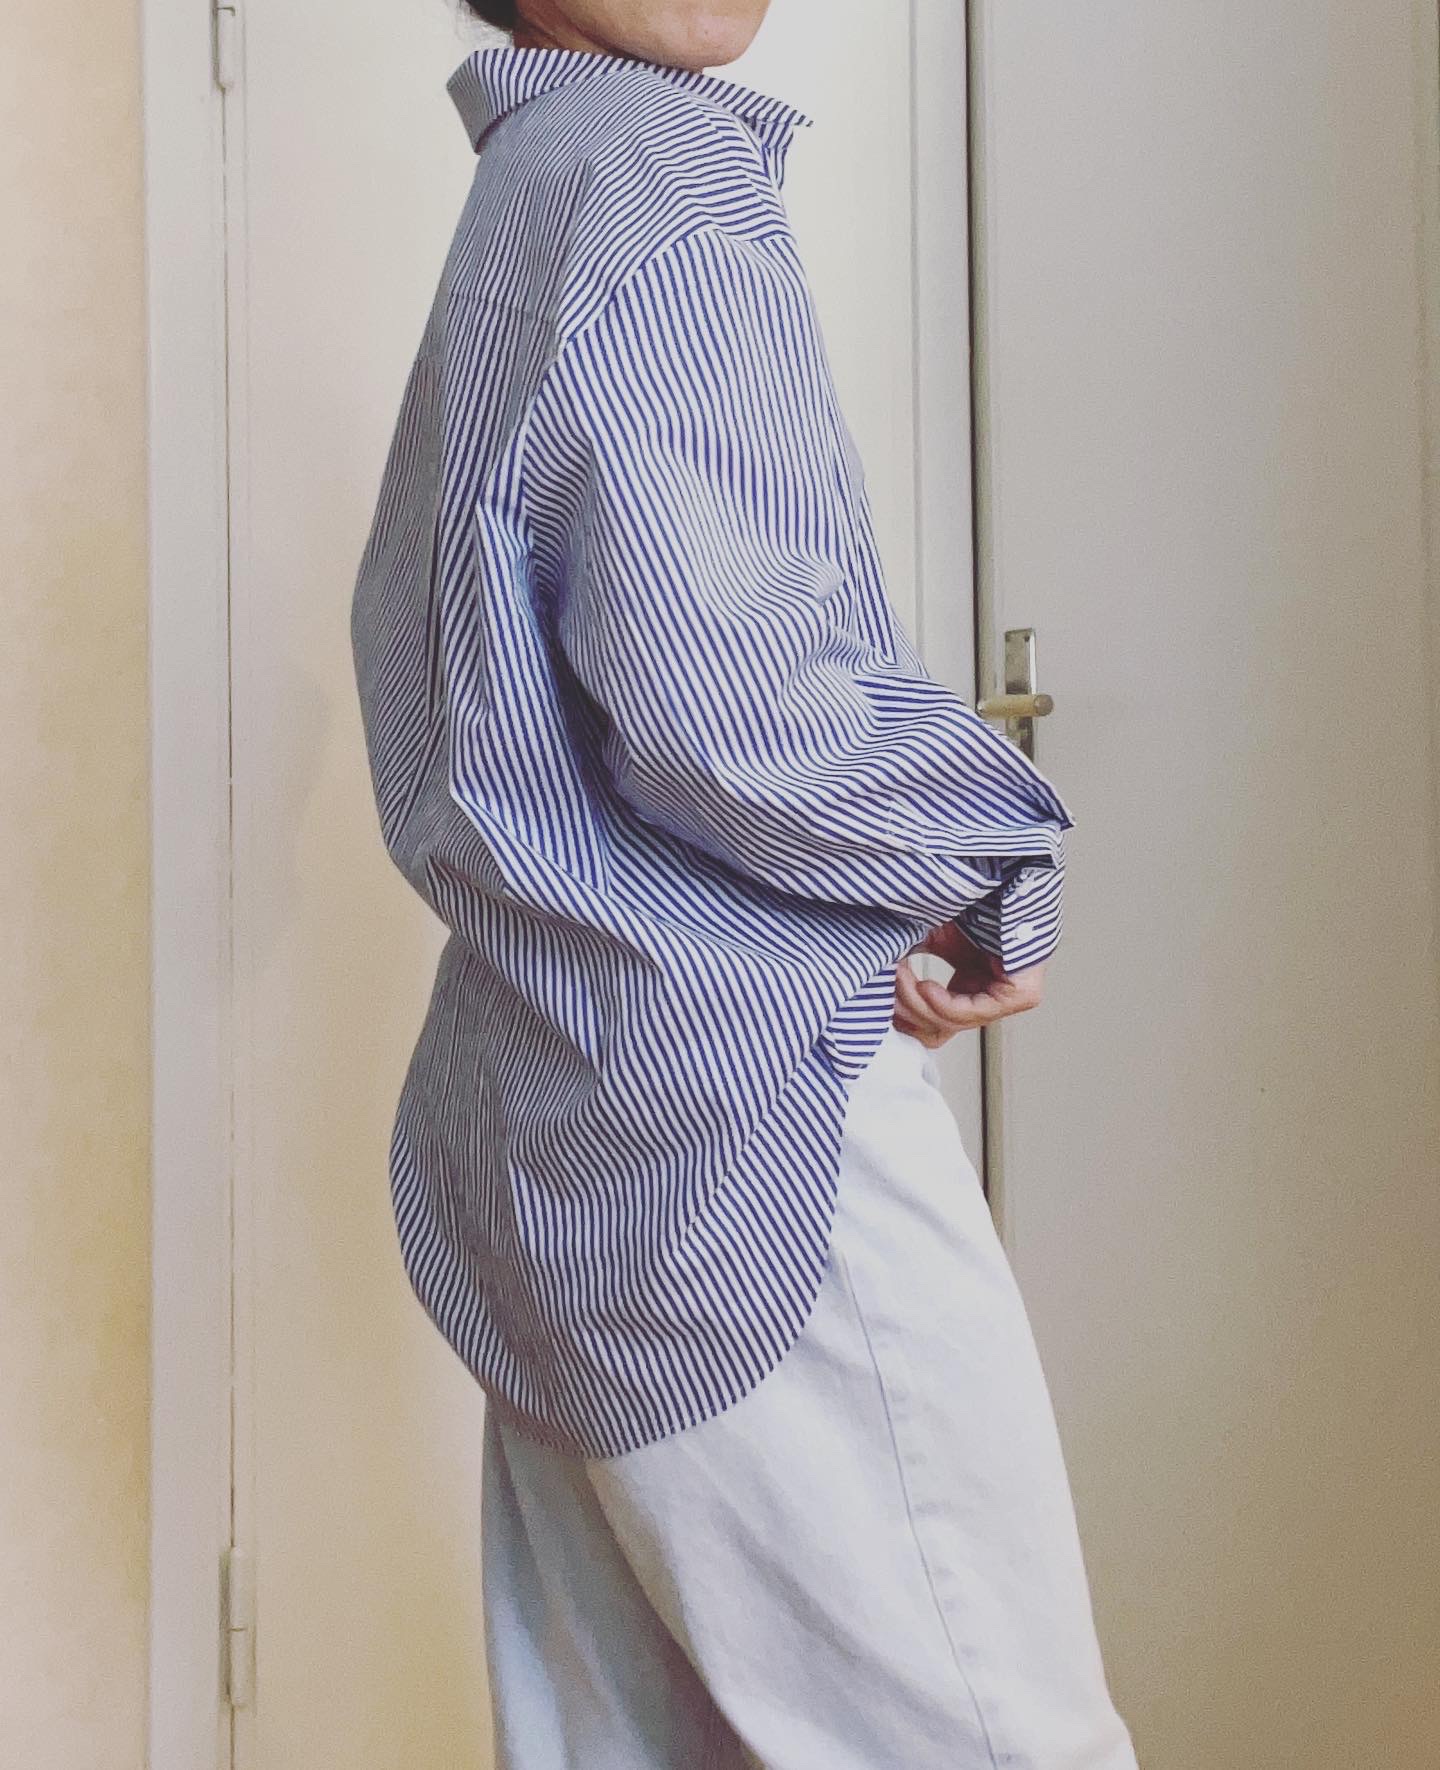
The pattern came together beautifully! The design of the shirt has the perfect amount of oversize ease, and lends itself to styling in a lot of different ways. Interestingly the back pattern piece is slightly narrower at the top than the bottom hem, which makes the garment “swing” forward. 

I also like that they use 1cm (3/8”) seam allowances, garment measurements in the instructions, very good instructions. 

I will definitely be looking out for more Viki Sews patterns in the future! 

What did you dislike about the pattern? 

The order of construction doesn’t lend itself well to making fit adjustments during sewing. 

Fabric Used: 

2.0m x 130cm cotton shirting from Mood in New York. So beautiful to work with! Life is too short to sew with bad fabric.  

Pattern / alterations notes

I made a size 36 and a mash up of height 1 (154-160cm tall) for the body length and 2 (162-168cm tall) for the arms (since I have a short torso with regular/longish arms). I ended up shortening the arms by 1cm but only to fix a mistake I made during sewing. 

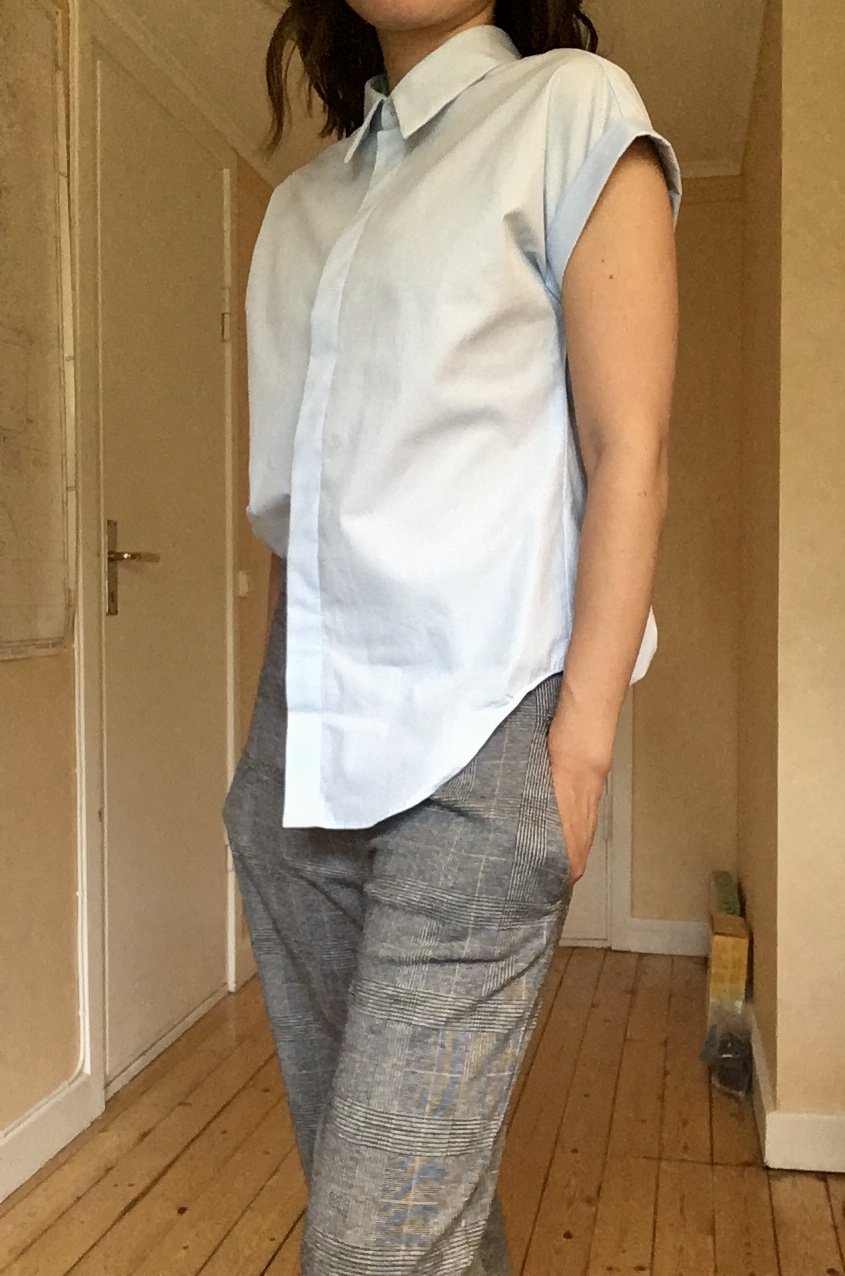
The model has the arms pushed all the way up to her forearms, but I think this would make the cuff too wide when in the normal full length position (unless you were to add another set of buttons). I read someone else thought that the cuffs were quite narrow, though I have very skinny wrists.

Construction notes

Used French seams to finish the arms and the body, as the body is cut straight. 

Used lightweight knit interfacing. Skipped interfacing on the sleeve tower placket. Single interfacing only on all other areas except the cuff. However, next time I’d interface the collar stand as it’s a bit wimpy. 

Didn’t use my roll hem foot, as the curve was so steep that it was easier to sew a line of stitching and fold over instead.

Possible modifications to make / next time? 

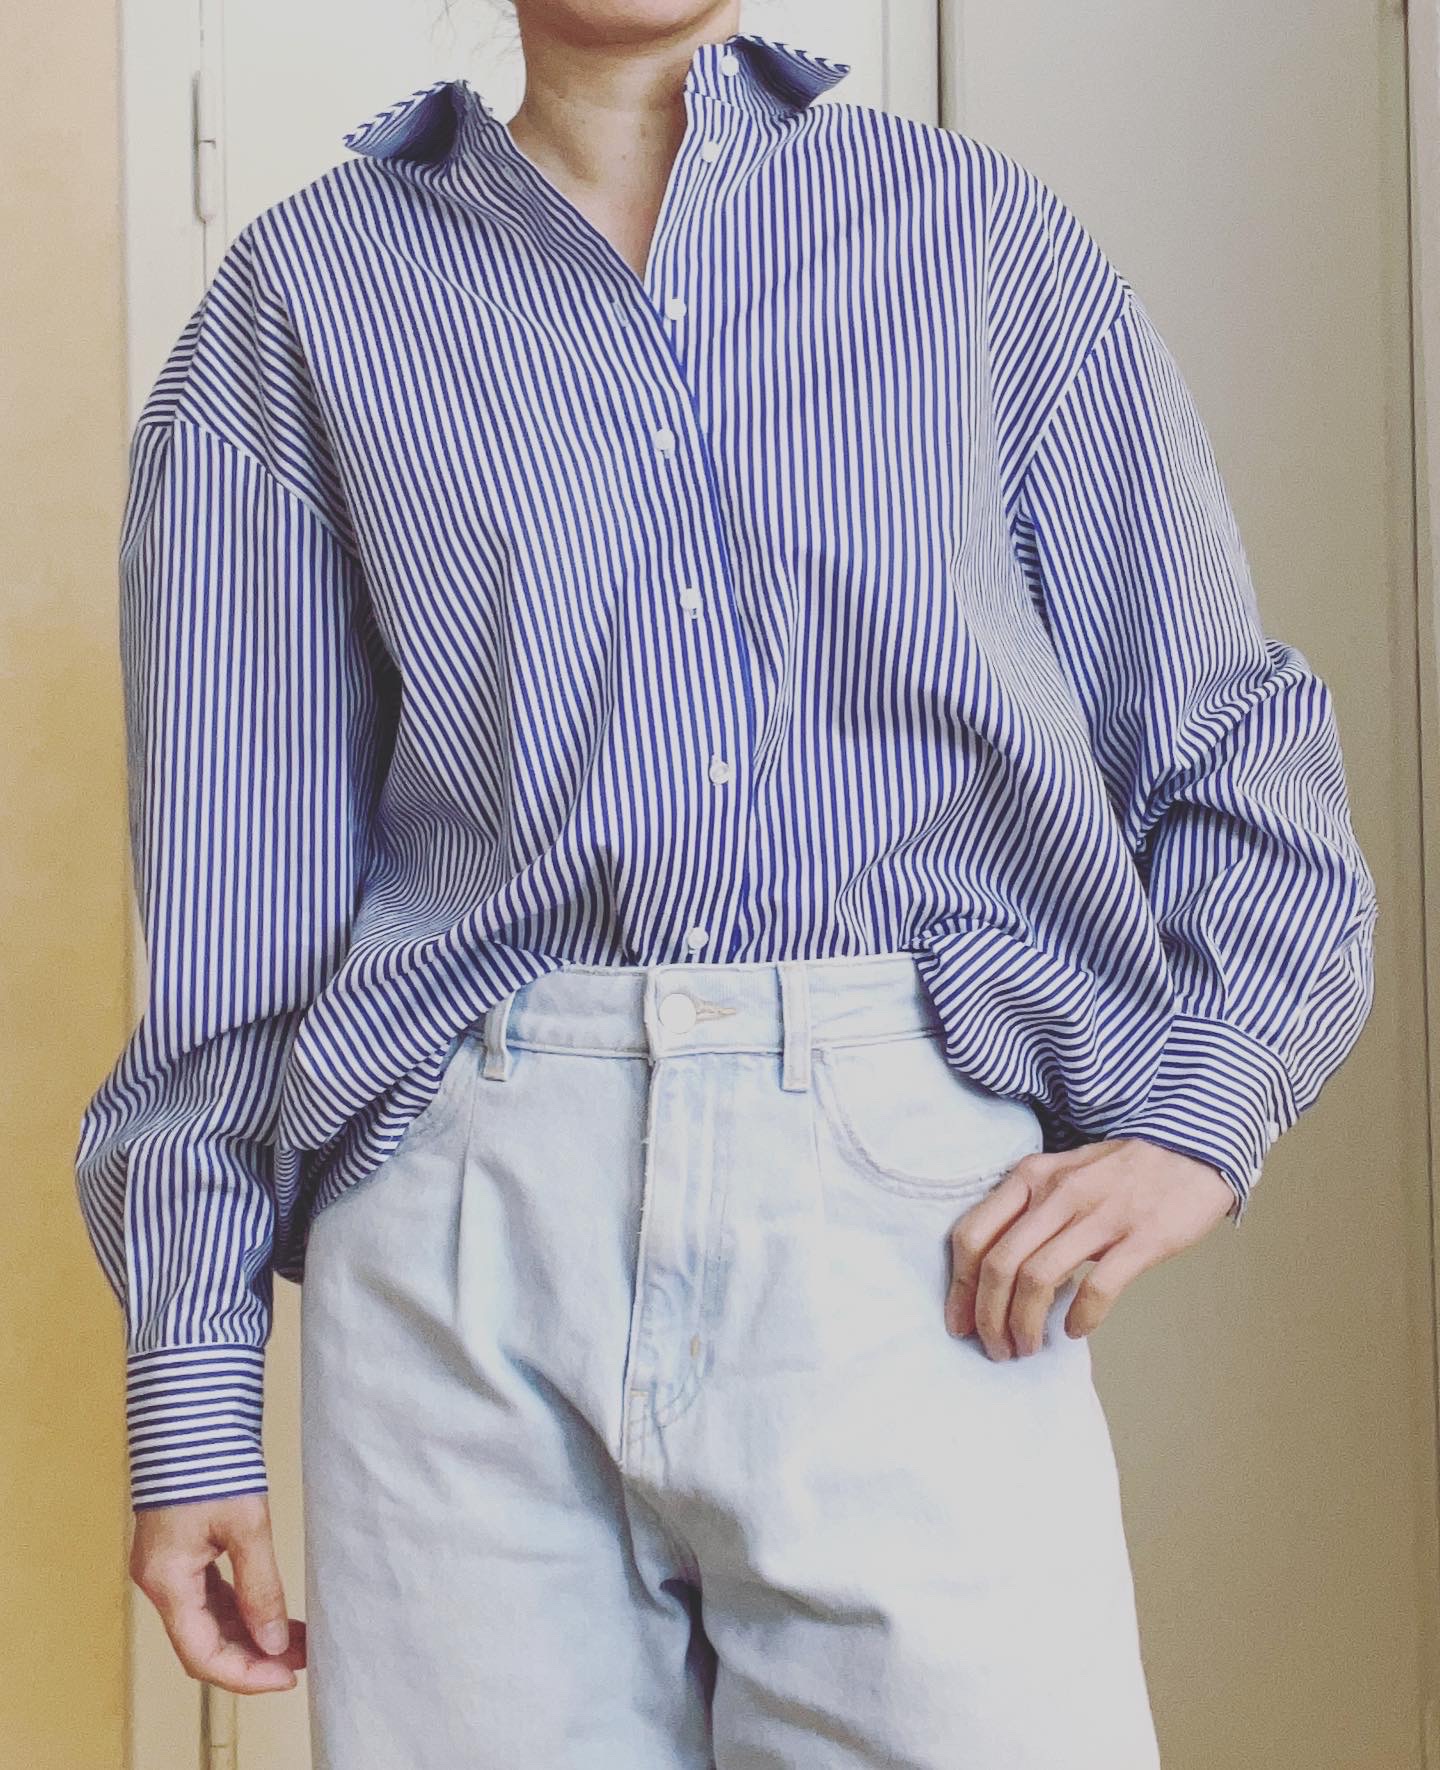
Maybe deepen the curved hem at the sides so I can tuck in the front only. Right now the front tuck is a little messy. For now I’ll live with the shirt a little since I’m kind of dreading taking apart the sides again, given that I’ll have to work carefully and quickly to avoid the side French seam unravelling.  

Would you sew it again? Would you recommend it to others? 

Absolutely recommend if you’re looking for an oversized shirt. For now I’m a little burnt out so it’ll be some time before I tackle another complex project. 

Though I see the parts where I’ve made small mistakes, overall I’m extremely proud and happy with the result! This is definitely one of my best made projects and I can see myself wearing this all the time – from the office, to a dinner out, to a beach cover up, and styled in a lot of different ways. All that hand sewing, pondering about sizing and construction really paid off.

McCalls M7387 once more

As fall rolls around and the weather gets colder, I usually start to get my sewjo back. I started this McCalls M7387 shirt back in December, and planned to draft a collar stand and collar using David Page Coffin’s shirt making book… which was the main reason I was procrastinating. When I got around to starting it again, I realised I didn’t have enough light coloured interfacing, so again I got temporarily derailed. (Maybe it’s a good idea to build up a stash of often used materials!) But still no collar drafting… 

McCalls M7387

So while browsing Instagram last week, the Viki Sews Cynthia dress shirt pattern caught my eye, and I jumped at the chance to buy the pattern while telling myself I could use the collar to finish the shirt. Sometimes you have to bribe yourself. 

Viki Sews Cynthia blouse

Some pics! 

How the pleat was supposed to look – now the inside of the garment. I have to admit, it is somewhat satisfying seeing the inside looking relatively neat.

The pants are Ralph Pink Coco Trouser (which I thought I had blogged about previously but apparently not). I tapered the trousers considerably – twice actually. When I learned about grain line on pants, I realised I had tapered them incorrectly the first time (which was why they were twisting around my legs while walking). For awhile I was avoiding fixing them, but I actually find it surprisingly quick and satisfying doing fixes, considering how much effort the whole garment making process makes.

Ralph Pink Coco Trouser

Design and construction notes

I didn’t make the front fly, but a hidden button placket, turning over the fabric to reduce bulk. Closet Core Patterns tutorial for the Kalle shirt was helpful (though I think I also referred to one more tutorial online). The thing which puzzles me is the amount of interfacing everyone seems to use. I used knit interfacing which is super light weight, but I feel like with the hidden placket and all those layers, the front band is still a tiny bit on the stiff side. Still, it’s completely wearable. 

As a side note, my boyfriend had a worn out dress shirt he was about to throw out, but I salvaged it for the buttons. I was curious about the interfacing situation, so I took it apart. And what do you know! Front placket: total of 1 layer of interfacing (none on the button side!). Collar stand: only 1 layer of interfacing. Collar: only 1 layer of (a very sturdy) interfacing. 

So next time, I’m going to try reducing the amount of interfacing on the front placket. And I definitely need to find some old, worn out but nicely constructed garments at the thrift store to take apart. 

I used the burrito method for the yoke. And then I accidentally sewed the wrong fronts (i.e. “inside out”) and so I decided to live with the back being a box pleat instead of an inverted pleat. I was a bit undecided whether it looks a bit too huge 

I installed a proper collar and stand. I used Viki Sews Cynthia pattern for the collar and stand, which thankfully fit. I really love the collar shape – normally I hate buttoning up collars all the way, but this one is WOW! So excited to start on the Cynthia shirt next!  

What I would differently next time

I might size up next time if sewing this in cotton? I don’t know why people complain about excess ease in the Big 4 patterns – I definitely don’t feel like this is the case. It actually feels like it’s kind of tight around the back and hips and riding up. Maybe it’s just more noticeable in cotton than my previous version in viscose.

The other thing I would do is to not be so hard on myself, and to really slow down. Even with this shirt I slowed down and tried to do it as well as I could, yet still ended up with a ghastly amount of mistakes and sloppy work. But now that the shirt is done, I realise how much I learned on the way, and really, no one else will notice the mistakes except me. Looking at it from another perspective, there are lot of really beautifully done details on the shirt – and I can totally see myself wearing it lots! And the next shirt(s) will be even better! 

One thing I realise is that the quality (or lack thereof) of the construction really shows up on plain cotton. There’s nowhere to hide the mistakes compared to flowy viscose, or a loud print. Conversely, it is pretty satisfying to see nicely done details in a plain fabric. 

More sewing pattern review details 

Pattern Description:

Top, tunic and dresses (semi-fitted through bust) with one-piece collar. Large back pleated into self-lined yoke with forward shoulder seams, and front-fly button closing.

I made view A, the top view. 

Pattern Size Selection:

I made a size S, and was glad I didn’t size down, as the pattern doesn’t have excessive ease. 

Fitting alterations:

Did a 1″ swayback adjustment. 

Were the instructions easy to follow?

This is my second time making this pattern and previously I said their fly front instructions were confusing. I only followed the instructions loosely. 

What did you particularly like or dislike about the pattern?

Like:

The amount of design ease. The kimono sleeve.  

Dislike: 

All the slip stitching! 

Instructions aren’t great. Following their method for the fly would end up being quite bulky – there are better ways to construct parts of the garment. 

Fabric Used:

1.8m Rose & Hubble cotton poplin in Candy Blue from Minerva

At first, I wasn’t sure if the huge box pleat looked strange in cotton, but overall I’m quite pleased with the shirt.

Buttons are from Minerva Impex G070118 0.5” diameter clear button. 

Would you sew it again? Would you recommend it to others?

If I were only interested in the top, I would probably have bought Closet Core Patterns Kalle shirt instead, since I struggled so much with the instructions. But I feel like I got my money’s worth by making 2 quite different garments from the same pattern! I may even make this pattern again. 

It will depend on how much I like the results from sewing the Viki Sews Cynthia shirt. 

McCalls M7946

My version of the Killing Eve Vilanelle dress! There were a few different dress patterns I considered such as the Friday Pattern Company Wilder Gown. But ultimately, I decided on a dress that was more scaled down that wouldn’t overwhelm my frame. 

Was also undecided about whether to make the dress as is, or to use shirring elastic. I ran into some challenges with ordering online, as the elastic was stiffer than I expected, and the bias tape quite rough. (As well, the pink cotton lawn sample was a hideous Pepto Bismal color, so I ended up ordering one more sample in lilac before placing an order.) I finally decided on using shirring in the waist, as I thought it would be more comfortable than being squeezed and chafed by elastic casing around my stomach. 

Initially I planned to make view B, but after having looked at and thought about this pattern for a year (yikes my indecision and procrastination), I thought the dress on the model looks a little too sweet and fitted, and decided to size up and go big by sewing the longer sleeve version and lengthening the dress. I’ve been finding that I prefer a lot of ease in my garments lately. Feels a little more “chill” and fashion forward, as opposed to Forever 21 vibe where the clothes are cut as small as possible to conserve fabric. 

Pattern Description:

McCalls’s M7946 Pullover dress has elasticized upper edge and waist with bias tape casings. It comes with 4 different views (different sleeve options, and lengths with or without a ruffle). 

I made view C but with a longer hemline, and used shirring in some parts. 

Pattern Sizing:

Comes in sizes 4-12, 12-20. 

How I selected my size. Based on their size chart, based on the chest measurement I should take size 6, and hip measurement between 10 or 12. Since I wanted more ease in my dress, I sized up to size 12. 

Did it look like the photo/drawing on the pattern envelope once you were done sewing with it?

Yes, except the changes I made. 

Were the instructions easy to follow?

Pretty easy to follow. I thought since it was an “Easy to Sew pattern” that there would be more hand holding such as when and how to finish seams. But I did learn a few tips such as putting tape on the wrong side of the fabric. 

What did you particularly like or dislike about the pattern?

The dress is basically rectangles, so it’s easy to cut out. I got confused cutting out the dress and accidentally cut it longer (which was a fortunate mistake because I didn’t realise how short the dress design was). 

Where the square corners meet, there is a lot of stress in the corner. Not sure if there would have been a better way to reinforce or design this? In any case I used some interfacing there.

In some ways the pattern is indeed “Easy to Sew”, and the elasticised design helps to hide any mistakes in sewing, and easy to fit. On the other hand some details are quite tedious with eg gathering, and lots of lines, though I guess great practice for a beginner? 

A slight annoyance with paper McCalls patterns are that the illustrations are quite small. This is where electronic pdf instructions win out, since you can zoom in. 

Fabric Used:

Cotton lawn in Candy Cotton Lilac from Minerva

Pattern alterations or any design changes you made:

I lengthened it by 14 cm. 

Used shirring elastic in the bodice and sleeve instead of elasticised bias tape casings.

Interfacing in the square corners. 

Would you sew it again? Would you recommend it to others? Tips for others?

Not sure if I need another dress in this style. I’m curious about other similar dress patterns on the market, so I’m not sure if I would recommend this one wholeheartedly, but overall I’m happy with my dress.

Something to keep in mind is to buy 2 spools of matching thread since this dress uses a lot of thread, and I needed to use a different color in the not so visible areas. 

I also found Buried Diamond’s blog post on the same dress, helpful when deciding whether or not to go for shirring.

Faux Playsuit with free sewing patterns

In 2020, planning for a (cancelled) 40th birthday trip celebration with friends to Hawaii, I realized that I had very little appropriate clothing for the occasion! Living in Canada and then Sweden, summer is fleeting, and I always get away with wearing cobbled-together outfits during heatwaves. My summer “wardrobe” is pretty close to how Marie Kondo’s describes sad house clothes – leftovers that don’t otherwise make the cut. And after a year and counting of WFH, I’m realising that my casual wardrobe deserves as much attention as my “nice” clothes do. What better way to get in some hobby time sewing fun outfits? Even better, with free sewing patterns?

The fabric is a mystery remnant from Olssons Tyger (purchased 2 summers ago?). The salesperson thought it might be viscose-silk blend. I’m so impressed with all fabrics I’ve purchased from Olssons Tyger – everything is high quality and a dream to work with! I’m so happy they have a local store in my town, and just pray that they can and will keep going.

Now the patterns! The shorts are Peppermint Magazine Spring shorts. The top is Fibre Mood Frances. Review follows below!

Peppermint Magazine Spring Shorts

Pattern Description: 

Free downloadable pattern from Peppermint Magazine. The Spring shorts have a paperbag elastic drawstring shorts with a curved faced hem. 

Pattern Sizing:

Comes in size 8-16. I sewed a straight size 8, not grading up for my size 10 waist since the waistline is gathered. 

Did it look like the photo/drawing on the pattern envelope once you were done sewing with it? 

Yes, although I shortened the ruffle

Were the instructions easy to follow? 

This is my 2nd Peppermint magazine pattern, and I’m really loving their instructions and patterns compared to other patterns I’ve tried! 

What did you particularly like about the pattern? 

It’s truly a joy to sew with Peppermint magazine patterns – I need to try out more of their patterns, even though Boho is not typically my style. 

I love the finishing on Peppermint magazine patterns, they are superb for a beginner like me. These use a French seam finish on the pockets which feel sturdy and also look great. I love the shape of the curved, faced hem as well. 

I also liked that the pattern uses 1 cm (3/8”) seam allowances (my preferred SA), though it could be confusing since at the beginning of the pattern instructions, it states “1.5 cm (5/8”) SA unless otherwise specified”. There was one place they forgot to specify it was actually 1 cm (3/8”). I was glad I hadn’t trimmed off the extra seam allowance in advance as I sometimes do! 

Dislike about the pattern?

Not sure if I like the topstitched (faced) hem. I think they would look better with a more invisible stitch. 

Fabric Used: 

Mystery fabric store remnant from Olssons Tyger – the sales clerk thought it could be a silk-viscose blend, and it was a dream to work with! 

Pattern alterations or any design changes you made: 

Since I didn’t want the print to show through on the pocket, I pieced together the pockets from 2 pieces instead of 1, using a scrap piece of beige coloured knit fabric (didn’t have any lightweight beige woven fabric on hand) sandwiched in between. 

I also took a total of 1” off the waistband, reducing the height of the ruffle (since I am short waisted). 

Instead of overlapping the elastic waistband, I butted the elastic ends on a piece of cotton scrap to reduce bulk. 

I also omitted the tie for a cleaner look. 

Would you sew it again? Would you recommend it to others? 

I don’t need many pairs of shorts since I live in a cold climate, but these were so much fun to make that I might make them again. Definitely recommend! 

Fibre Mood Frances top

Pattern Description: 

Free downloadable pattern from Fibre Mood, a Dutch sewing magazine. Oversized boxy top with elasticised drop sleeves. High front neckline with a slightly deeper back and longer, curved back hem.

Pattern Sizing:

Comes in sizes XS-XXXL. I decided to size down based on others’ reviews.

Did it look like the photo/drawing on the pattern envelope once you were done sewing with it? 

Yes. 

Were the instructions easy to follow? 

Instructions are adequate. This was my first Fibre Mood pattern. 

What did you particularly like about the pattern? 

A very quick sew that takes up very little fabric. I did the facing in another fabric, and only needed 0.7 meters. 

Dislike about the pattern?

I didn’t notice that the back neckline is deeper than the front (as my back isn’t my favourite body part). The rear facing keeps flipping out (likely due to my sewing ability).

Fabric Used: 

Mystery fabric store remnant from Olssons Tyger – the sales clerk thought it could be a silk-viscose blend, and it was a dream to work with! 

Pattern alterations or any design changes you made: 

I finished the shoulder seams with French seams. 

Would you sew it again? Would you recommend it to others? 

A nice pattern to have on hand for using up scraps. I would probably only make this in drapey fabrics, but it could look cool in a more structured fabric on the right body type. 

Burda Asymmetrical Jacket 08/2019 #110 Sewing Lesson Review

Working from home since March, my most worn garment is the Cat Bomber Jacket! I can see how outerwear and jackets are very rewarding sews, as all the time put into sewing really becomes worth it. Coming into winter, and sitting still for long periods in an old house, I wanted a warm layering piece which looks office appropriate (for the day we return to the office). 

I always check out the Burda sewing lesson with the thought that I need to build my sewing foundation, though I’ve never actually made one of their featured patterns. The double layer of warmth over the chest on this Burda jacket jumped out at me. (Why is it that cardigans are open over the chest, exactly where you/I lose heat?) The tailored, retro style would also look great for the office. Score! 

Then, to find fabric! During the summer, I ventured out to my local fabric store to stock up on fabric in person. Their new selection of teddy fleece was perfect for making a warm, cozy yet fashion forward jacket! I had been a little concerned that the jacket could end up looking costumey, but the teddy fleece was such a fortunate pairing. 

Now the jacket took a lot longer than expected, as I ran into some challenges. Before putting the lining in, I tried on the jacket and it looked hugely unflattering! As well, the darted and then faced cuffs were pretty bulky. Still, I wanted to have fleece on the inside of my wrists to keep them warm. Working with bulky fabrics is a learning experience in of itself, so I had to make some adaptations. 

Pattern Description: 

Bring a touch of 60s design into your wardrobe with this asymmetric cropped jacket with the constrast color buttons in a horn look. The generous sleeves are drawn in at the hem with darts for a boule effect.  

Asymmetrical cropped jacket featured in burda.com‘s free online sewing lesson https://www.burdastyle.com/blog/blogsewing-lesson-110-asymmetrical-cropped-jacket-082019 

Pattern Sizing:

Burda regular size range. I sewed a Size 36 and it has lots of ease. 

Did it look like the photo/drawing on the pattern envelope once you were done sewing with it? 

Yes, except my changes. 

Pattern alterations or any design changes you made: 

I accidentally cut too short of a hem allowance. 

Working with teddy fleece, the darted and faced cuffs became far too bulky. As well, the jacket overall just looked huge and unflattering on me. It was helpful to “park” the project awhile while I figured out how to proceed. 

To reduce the bulk, and to make it look more figure flattering:

  • chopped the sleeve to be bracelet length (8.5 cm, a little too much in hindishgt)
  • installed a “cuff” made out of fleece (10 cm x 21.5 cm, a little too tight in hindsight)
  • top stitched around all edges to help them lay flat 

It was a pretty good save, except that I overdid the shortening and decrease in cuff diameter, so I can’t do a deep stretch forward XD 

I also skipped the fasteners so as not to weigh down the front. Generally I don’t wear the jacket closed as it looks better open, but it does stay closed while sitting and working at my desk when I need an extra boost of warmth. 

Were the instructions easy to follow? 

The Burda sewing lesson is much more detailed than their typical short instructions, although as a beginner there were a few spots I puzzled over. 

What did you particularly like about the pattern? 

Beautiful full darted (bishop?) sleeve!

Dislike about the pattern? 

Just be aware that this jacket has a lot of ease which you may want to adapt. 

Sewing fail (Patterns for Pirates Summer PJs review)

It’s with some reluctance that I write this negative review. I sewed up both shorts variations of this pattern back in May, and finally got around to writing about them. It’s not so fun to write about sewing fails. And less so when I believe that that it’s not due only to my own mistakes. 

As a (somewhat) beginner, it’s difficult to know what is user error vs. errors in patterns. I really wish there were more critical sewing pattern reviews out there, to help beginners recognise what to look for, rather than blaming themselves for subpart results. So I hope this review will help someone out. Mostly I wish I hadn’t wasted my money on this pattern. On one hand, it’s “only” $9, but I don’t think it’s unreasonable to expect a level of professionalism when for the same amount of money, I could have purchased a better pattern and put my time towards making a usable garment. 

First off, the fit or draft of this pattern doesn’t work at all for me. In hindsight, I can see that the line drawing is not very “detailed” or correct, and I suspect that the pattern reflects this kind of “freestyling”. 

The first pair I made (the longer shorts version) I thought were okay. Until I started wearing them for a longer period of time. Basically I can’t bend over while wearing them, otherwise the crotch seam rides uncomfortably up into my crotch, making them strictly sleeping shorts. 

The second pair I made, the low rise “cheekies”, I basically threw them into the bin minutes after making them. As soon as I tried them on, they ride directly up into my crotch even while standing straight. My guess is that due to the low rise plus minimal fabric backside, that there is nowhere for the shorts to “stop”. Now that I think about it, cheeky type underwear usually has a gusset, which makes the underwear wedging up into your privates more bearable.  

I also disliked the instruction photographs. The quality of the images just felt a little… homemade. The lighting in the photos are quite uneven and sometimes difficult to see details. Different steps showed photos of different fabric shorts being made up at different stages. I’m really trying not to sound mean, and maybe it just comes down to personal preference, but the impression it gives me is of an internet-DIYer amateur trying to cover her costs rather than a professional pattern company. I just expected more somehow.

A snapshot of the instructions (really hoping more people would post photos of actual pattern pieces and instructions in their reviews online!)

What I liked about the pattern

I do think the directions are very good for beginners – she describes how to “quarter” elastic when sewing the waistband. I also skimmed the other instructions such as how to make bias (for the top).  

Conclusion

I haven’t contacted the company about my overall review of these shorts, though while I was making them, I emailed them to point out a few mistakes I found. I never received a response or thank you, so I interpreted their silence to mean that they aren’t too fussed…

Maybe her other patterns are better. However, I was so off-put by my experience with this pattern that I will look elsewhere for patterns. I would not recommend this pattern to anyone. 

Seamwork Neenah review and maxidress hack

Back to sewing again after a few months break. It’s amazing to see what others are making, which is why I realized how important it was to focus on what *I* really wanted to get out of sewing. Better fitting clothes, out of materials I enjoy wearing at a price I can afford, in short. After grappling with this nightmare of fitting this Burda top, I signed up for Alexandra Morgan’s course on bodice block drafting. (Highly, highly recommended!) And then burnt out a little after pouring days and weeks into the course. 

Anyhow, with some advice from Patternreview forums, I realized, fitting will take years to master. It was time to put some of what I learned into practice. Used my sloper, along with measurements of existing garments in my wardrobe (advice from Peggy Sagers from Fit2Stitch/Silhouette Patterns) to make some adjustments. I made a simple jersey top (a hacked knit top from Burda 08/2019), and the Seamwork Neenah.

Pattern Description: 

Neenah is a classic turtleneck dress. Neenah’s knit construction and flattering shape make it a comfortable and classic wardrobe staple. 

Pattern Size Selection:

Comes in sizes XS-3XL I sized up to a S, using the finished garment measurements instead of the size chart XS. I didn’t want negative ease in my garment, as I it’s my preference not to look like a stuffed sausage don’t feel comfortable in skintight garments. The finished garment was to be 35”, which is exactly my hip body measurement, and I kind of regret not adding extra ease here as well, as you can see the garment is pooling around my lower back. 

Fitting changes made:  

I noticed that the shoulders of the pattern are quite sloping, so I made a square shoulder adjustment. 

Design changes made:

Lengthened the garment by about 3-4”. I added a side slit, but I think I might sew it up instead, since the knit is curling under (probably the slit finish isn’t very suitable for this weight knit?). 

Construction notes:

I added clear elastic to stabilize the shoulder seam. 

For next time:

I would fold out a bust dart, as you can see the fabric is folding over beside the bust (I have this problem in all my RTW garments as well). 

Maybe skip the cuffs, fold over and hem (since the sleeve is already narrow) 

Increase the hips by 1-2”.  

What did you particularly like or dislike about the pattern?

Like: Finished garment measurements available. The narrow sleeves fit nicely, and I like the overall cut of the garment. 

Dislike: I feel like Seamwork could be more helpful towards beginners by advising steps like adding stabilizing elastic in the shoulder seams. 

Fabric Used:

2 meters cotton jersey from Minerva Crafts 

Would you sew it again? Would you recommend it to others?

Yes, I’ve already planned a cream turtleneck top next. A great basic to have in your wardrobe.

McCalls M7387 maxi shirtdress review

Funny how despite saying to myself that I don’t need more dresses in my closet, I suddenly got inspired to sew up a loud floral maxi dress. Well, part of it is due to fumbling with my 2nd Heidi shorts/skort, where I’m not quite sure how to proceed in the process as I’ve never worked with that type of fabric before… But it’s also thanks to my recent sewing room tidy up, where I was re-inspired by my pattern stash (McCalls M7387 bought 3 years ago) which was calling out for the digital viscose bought in Sri Lanka 2 years ago!

And maybe also being at home most of the time, I felt like I needed a pick me up. Most of my RTW clothes are black and white, so my recent sews plus my recent fabric order (patterned pink fabrics with lips, and pink leopard) feel a bit out of the ordinary for me!

Although, when I reflect about what I want to sew, I guess there are 2 big draws for me: the potential to make better fitting clothes, and the potential to make clothes I can’t buy. I’m especially inspired by the joyful, colourful makes of some instagram sewists! Why bother sewing a boring grey tshirt??

Now, pics! Personally, I prefer the dress belted, though I included a photo of it with and without a belt.

My review on Pattern Review:

Pattern Description:
Top, tunic and dresses (semi-fitted through bust) with one-piece collar. Large back pleated into self-lined yoke with forward shoulder seams, and front-fly button closing.

I made view E, the longest dress with a straight hem and belt.

Pattern Size Selection:
I made a size S, and was glad I didn’t size down, as the pattern doesn’t have excessive ease. I chose the size by comparing the depth of the armhole to similar RTW kimono sleeve dresses I own (on me, the armholes of RTW are often too deep, but the Mccalls didn’t – you may have to check this for yourself).

Fitting alterations:
Did a preemptive 1″ swayback adjustment. Shortened the hem by nearly 6″?

Design changes you made:
– I only had 2 yards instead of the 3 called for, so I made the pleat less full.
– I also didn’t make the fly placket, instead extending the center front to be able to turn over the fabric for the fly.
– I made the belt thinner and longer, since I had limited fabric. I think the thinner belt actually looks nicer.
– I added side seam pockets, but made the mistake of using a heavier viscose which made the pockets bulky

Did it look like the photo/drawing on the pattern envelope once you were done sewing with it?
Yes, except my changes.

Were the instructions easy to follow?
I didn’t understand their directions for the fly front because their illustrations for that step are so tiny! And since I had improvised my fold over front placket, I was puzzled by how I should proceed with finishing. I ended up hand sewing a makeshift solution.

Construction notes:
I found CodyMoran’s pattern review really helpful! I also opted to use the burrito method. I tried to avoid all the slip stitching they call for in the instructions.

What did you particularly like or dislike about the pattern?
Like:
The amount of design ease
Love the huge back pleat! I think it would look amazing in a cotton woven with more body, although probably the shorter D version.

Dislike:
All the slip stitching!
Don’t have a clue how the front fly and collar should come together, the next time I sew this.
The one piece collar and placket intersection – unclear how it is intended to come together.

Fabric Used:
2 yards of Digital viscose

Would you sew it again? Would you recommend it to others?
Despite my difficulties, I will sew this again! Next time, in the shirt version A.


Seamwork Georgia review – sewing my fabric stash

I have been eyeing the Seamwork Georgia for years. I love how their version looks on the model, though I really didn’t think it would look flattering on me. When I started sewing, I went a little overboard with buying fabric, and there is one particular floral viscose twill I purchased without knowing how difficult it might be to sew. I intended it for a pattern I hoarded bought, a blouse with buttons (which I now recognise as not really being my style), which would be way too finicky. For that matter, I don’t think the fabric is really my style either – as beautiful as it is, it feels a little bit “mother of the bride” and matronly on me.

I’ve been trying to alternate sewing my stash with new fabric purchases, and decided to sew the Georgia as it is a really simple design with few seams, and the length would really showcase the print.

I made a muslin (only made up to the empire waist length), and was surprised I would need an FBA. Yet, sewing my fashion fabric, I tried on the dress without sleeves and my boyfriend commented it looked like a tent 😦 I proceeded to take out nearly 4″ total ease from the side seams… yeah, I should have seen the train wreck coming…

Since the fabric was super temperamental, I French seamed everything… so when I finally put on the sleeves, now the dress is slightly too tight across the back to be able to reach forward! And there wasn’t anything left to let out anymore *facepalm* So now that’s 2 woven tops/dresses with set in sleeves in a row that are slightly too small for me… I guess lesson learned that I need MORE EASE!

Sometime soon I will revisit the Palmer Pletsch fitting sheath dress project that I’m working on, and this time with sleeves. It’s just frustrating to work so hard on something only to have it not fit well.

Anyhow I guess this dress is a learning experience. I was able to apply some of the fitting adjustments I learned from my ongoing Palmer Pletsch fitting project, and I have to say that the dress looks pretty good through the back and shoulders, and an extra inch or 2 would have given a really good fit.

Also, this was the most challenging fabric I’ve worked on to date. The hems are wonky (now learned that yes, I should have listened to my gut to trim them), but I can wear the dress. I realised as well thatI don’t I enjoy working with slippery fabrics – I’m fine with buying drapey dresses (I don’t need that many dresses for my lifestyle), as I’d rather learn to sew with more stable wovens for more tailored garments. This also confirms that I still don’t like wearing boxy, loosey goosey garments with a lot of ease.


Pattern Description:
The Georgia dress is one of the simplest garments to make and wear. A slip-on woven shift with no closures, plenty of ease, a slight empire waist, and short sleeves, this dress is sure to be a favorite.

Pattern Sizing:
0 – 26. I made a size 2, with a lot of adjustments.

Did it look like the photo/drawing on the pattern envelope once you were done sewing with it?
Yes except that I modified it to remove the empire seam. As well, I lengthened it considerably by 4.5″, and I removed a lot of the style/wearing ease.

Were the instructions easy to follow?
I only glanced at the instructions. I used an alternate method to finish the facing, from Fashion incubator – a better way to sew facings Which I’m quite glad I did, because my facings ended up quite misaligned (due to my sewing inexperience) by the time I was going to sew the shoulders.

I also hand sewed the hems, as I couldn’t get a good finish on the sewing machine.

What did you particularly like or dislike about the pattern?
I knew coming in that this pattern has a lot of ease, and despite reading another review online that the dress was like a tent, I proceeded to make it anyway… I agree that it looked too much like a tent and removed a lot of ease (nearly 4″, which ended up being too much, and now the dress is slightly too small across the back).

I was looking for a “simple” dress pattern for a particular fabric in my stash. I probably should have looked for a proper A-line/trapeze pattern instead of modifying this pattern so much.

Fabric Used:
A slippery viscose twill from my stash.

Pattern alterations or any design changes you made:
Fitting changes:
– swayback adjustment
– shortened the shoulder length by 0.5cm (1/4″)
– forward shoulder adjustment, low right shoulder
– FBA (in the muslin). In the fashion fabric, I thought that the bodice had too much ease so I removed nearly 2″ from the side seams down to the hip, but I went a little overboard and now the dress is too small across the back. Lesson learned…

Design changes:
– removed the empire seam
– lengthened the dress 4.5″
– reduced the width of the neckline by 5/8″ (1.5cm) on each side so that my bra straps do not show.

Would you sew it again? Would you recommend it to others?
I don’t think this dress style is super flattering on me, so I don’t think I will make it again. There aren’t too many people who have made (or shared) this dress on Instagram, so there might a good reason for it…

Peppermint magazine Into the Folds Ruffle Sleeve Top

Finally, trying to focus my sewing projects on actual skill building! I wanted to do a “simple” project with minimal fitting, as I’ve been burnt out from last week after trying to fit a bodice top to match my Seamwork Heidi linen shorts. I’ve had this free Peppermint Magazine Into the Folds Ruffle Sleeve Top and the fabric sitting my stash since September… oh the shame.

… and of course, one of the first things I had to do was to try to shorten the back armhole… which caused me tons of headaches. Also, despite making a half muslin (muslin of the top made to the length of the facing), the end result is disappointingly slightly too small for me.

Fitting is really messing with my mind, as what I’ve found by trying to fit by reattempting the Palmer Pletsch Tissue Fit Sheath Dress Pattern is that I need to go down a size (actually use my high bust measurement as many others have nagged about), and then let out the side seams. BUT, it seems with Indie patterns (or at least this one) I should not go by my high bust since the shoulders are not massively oversized but instead use my normal RTW equivalent size.

OK, pics!!

I puzzled over how to deal with the bust facing, where many warned that the facing basically cleaved the breasts in an unflattering way if using a semi transparent fabric. In the end I just extended the front by about 2″, and it seemed to work ok. There is of course excess fabric, but since the top isn’t totally sheer, it’s not noticeable.

IMG_2587

Pattern Description:
Free pattern from Peppermint magazine, pattern by Into the Folds. This is a boxy ruffle top for wovens, finished using either bias binding or a facing, and French seams.

The Ruffle Sleeve Top is compatible with a range of different fabrics. Consider using light to
mid-weight fabrics such as: linen, linen blends, cotton, gauze or chambray. For a softer silhouette, consider sateen, silk or viscose (rayon). Be careful if you are a beginner though, as these fabrics are a little trickier to sew.

Pattern Sizing:
Letter sizes A to F, which correspond to high bust 28″ – 49.5″.

Did it look like the photo/drawing on the pattern envelope once you were done sewing with it?
Yes

Were the instructions easy to follow?
Very much so! Excellent for me as a beginner, and a great way to learn/practice French seams. If I’m being very picky I wish they had described how to trim the “V”.

What did you particularly like or dislike about the pattern?
Likes:
– Free!
– Very beginner friendly instructions.
– Love that the pattern is even marked with with seemliness, and notches for the french seams, which really helped me understand how a garment comes together.
– Learned a lot using this pattern, and gave me lots of opportunity to practice sewing 1/4″ (6mm) seams allowances.
– Uses less than 1 spool of thread.

Dislikes:
– as I read from other reviews, the facing falls halfway down the bust, so I extended the facing since I was using voile.
– The top is also a little too small for me (though this might be my fault for not selecting the right size, as I have this problem with RTW as well).
– I removed ease from the front shoulder cap.

Fabric Used:
Cotton voile from Minerva Crafts.

Pattern alterations or any design changes you made:
My “usual” fitting changes (forward shoulder, raise bust darts, low right shoulder). I also have a short upper back, so I shortened the back armhole, and wish I hadn’t bothered since it caused me a lot of headache in adjusting the facing, sleeve. etc. and the top is now slightly too small for me. I read that others also have limited shoulder movement, so I might suggest sizing up if you’re between sizes.

Design changes:
– lengthened the front facing (see the photo) by about 2″ – I puzzled a while over how to extend this facing.
– I also shortened the top by 1″, whereas others lengthened it. I wanted it to have more of an intentional cropped look (I’m also short waisted).

Would you sew it again? Would you recommend it to others?
Recommend this for beginners who want to improve their sewing level. I won’t be sewing this again, since I don’t need more than 1 top of this style, and I mainly wanted to use this pattern as a skill building project.

I definitely feel like I learned a lot from this project!